Are you worried because of your significant cart abandonment rate? Do you want to create an engaging Elementor Popup cart on your checkout page that helps users make buying decisions? Do you want to customize your popup cart with Elementor? This article is for you.
Various studies have shown that, on average, nearly seven out of ten customers abandon their shopping cart and leave your site without making any purchase. This is a shocking number. Do you know the reason behind it? The primary reason behind this appalling figure is your confusing cart page. Visitors come to your site and click the products to the cart but need help navigating through. Sometimes, your potential customer must return to your product page, resulting in cart abandonment.
Without customizing your WooCommerce Popup Cart, you are at a loss even if you have an attention-grabbing age design and an excellent customer support system.
In this comprehensive guide, we will discuss in detail what a WooCommerce popup cart is and why it is essential for reducing cart abandonments and enhancing sales. Let’s start.
WooCommerce Popup Cart
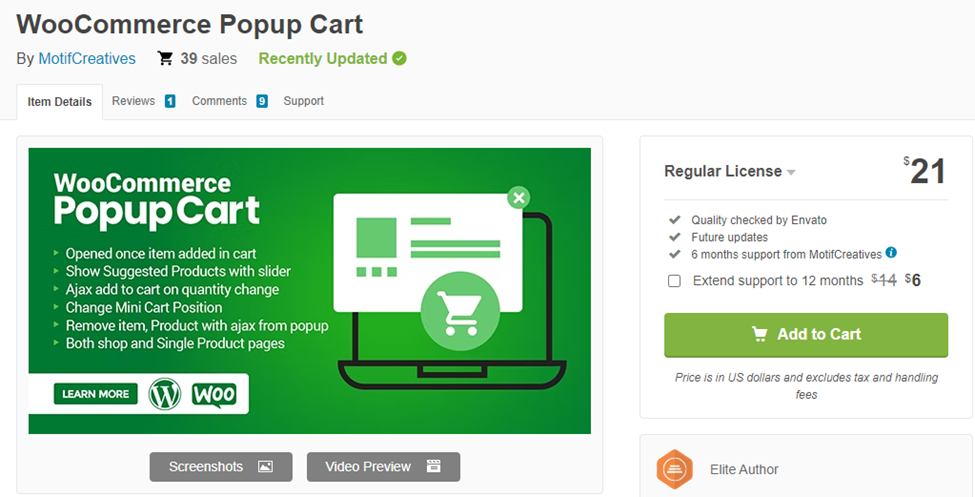
WooCommerce Popup Cart is an excellent plugin that offers handy features to WooCommerce businesses. It allows users the freedom to keep up navigating the shop. Your customer does not need to repeatedly return to your product page to select and add products to their carts. This is what we refer to as the ‘Elementor Popup cart ‘.
Also, your customers do not have to wait for the page to load or refresh. The products selected are added to the page immediately displayed with the “View Cart” and “Checkout” buttons.
These buttons help customers choose where to navigate. This feature of the WooCommerce Popup Cart stimulates your shoppers to buy more products.
WooCommerce Popup Cart is mobile friendly, which is crucial in today’s mobile-first world. It sets suggested products by category or by-products, removes added items without refreshing the page, displays a counter number of already added items, and displays product price, quantity, and SKU on the Popup cart, among other things. Customers can also view their popup cart anywhere on your website.
Benefits of a Customized WooCommerce Popup Cart
Today, more than 5 million users worldwide have installed this plugin to run their online businesses. A customized WooCommerce pop-up cart differentiates your product page, making it more visually appealing and attention-grabbing.
A customized WooCommerce Popup cart plugin benefits your online shop in many ways. For instance, it makes the online buying journey of shopping customers much more accessible. It allows potential customers to view their order list, change their order quantity, apply promo codes, and conveniently checkout. These features can significantly enhance the user experience and increase sales.
According to Sleeknotes reports, large online brands lose more than 18 billion dollars annually due to cart abandonments. Therefore, you must edit your cart today to make it unique and ensure a better user experience. For example, a customized WooCommerce Popup Cart can simplify the checkout process, reducing the chances of cart abandonment. You can do this by customizing your WooCommerce Popu Cart with Elementor.
How do you create a custom WooCommerce popup cart with Elementor?
Using the Elementor cart Widget is a straightforward and empowering way to edit your custom WooCommerce popup cart. By following the steps outlined below, you can create and customize your WooCommerce Popup Cart with ease, setting yourself apart from your competitors.
Step 1: Open the Elementor Canvas Page
Go to the “Admin Dashboard” on your e-commerce website. Click on the Edit option on your cart product page. A white page will appear with a button called “Edit with Elementor.” Then hit this button. Now you are on the Elementor canvas page. Click on the “Elementor Widget Gallery.” Drag and drop widgets to the right of the Selected area. Now, you can add the WooCommerce Cart widget and design your cart page as you wish.
Step 2: Drag and Drop the WC Cart from the Elementor Widget Gallery
In the second step, find the search bar and type ‘WooCommerce Cart.’ A ‘WC Cart icon’ will appear. Copy this icon and paste it into the selected area.
Step 3: Enable Coupon and Cross-Sells
The third step is to enable your coupon and cross-sells. Cross-sells are additional products that you recommend to customers based on their current purchase. Go to your ‘Content’ and click on ‘General.’ You can hide or display the Coupon Field and Cross-Sell options on your WooCommerce cart page.
Step 4: Upgrade Your Table Contents From the Style Section
The fourth step is to get into your ‘Style’ section. After clicking it, you will get seven more options for designing your cart page. These options are the cart table, cross-sells, checkout button, update cart button, cart totals on heading, and cart totals on the button; updating these buttons has many design options.
Step 5: Make Your Cart Table More Responsive from the Advanced Section
If you want to make your product page more unique and distinguished, go and click the advanced option. The advanced section will allow you to edit your background, customize happy effects, and make it more responsive for your customers. With this step, you have completed editing your WooCommerce cart page.
After you have edited your cart page, it’s time to make it more eye-catching. Make sure your WooCommerce cart matches your brand. You can do this by simply clicking on the ‘Style’ tab of the Elementor editor. This option will help you customize different areas of your product page.
- Style General Settings
Go to the settings and hit the ‘General’ section button. This section allows you to color your WooCommerce cart. You can also change the color of your cart manually, giving it a more enticing look.
- Click on the Table Section
After changing your cart color, click on the ‘Table’ section. This section allows you to change the typography, page margin, paddling, border type, and so on, making your page unique and fully customized.
- Change Up Other Design Aspects
Not only can you change color, but you can also change other aspects of your page. You can also change the color, appearance, and event text inside the ‘Cart Total,’ ‘Coupon Form,’ ‘Continue Shopping,’ ‘Button,’ and ‘Notice.’ You can also get into the ‘Advanced’ section to make your page more appealing.
Conclusion
WooCommerce is a simple WordPress plugin that helps you create your online shop within no time. WordPress is a hub of hundreds of plugins that extend the functionality of your WooCommerce site and change its default design. These plugins help you change your website design to create your unique cart page. One of these plugins is the WooCommerce Popup cart. By fully customizing your cart, you can reduce your cart abandonments and enhance your sales to the next level. This comprehensive guide will help you create and customize your WooCommerce popup cart with Elementor.